Tuesday, January 22, 2013

Paper Pieced Card & Question of the Day Regarding Provo Craft...

These cute little paper pieced jewels can be found at Treasure Book Designs.  It's the I Love U Slowly file.  I couldn't resist adding them to my "Feel Better" card as I knew they could cheer anyone up...sick or not. :)

Know what I've been practicing???  Eyes...yes, I am still trying to get the hang of doing eyes with wispy long eyelashes.  I still have a long way to go, but I am improving. :)
Also...the bunny's nose is pink in person, but the picture makes it look white.

Question of the day - For those that are familiar with Provo Craft and the Gypsy...why do they allow some ebay auctions for the Gypsy with linked cartridges to sell and other auctions are ended???  If selling a Gypsy with linked cartridges is a violation of the EULA...shouldn't all auctions be ended???
  Also...shouldn't they provide a way for us to unlink our cartridges so we may sell it if we so choose???  Especially since they no longer manufacture it???  

Have I mentioned lately that I Love my Silhouette???  They have great customer service, too!   

Tuesday, January 8, 2013

String of Hearts - Valentine Card

My second project using the Silhouette Cameo.  I can't say enough... how much I Love it and Love how it cuts...AMAZING!  Not to mention the endless sources available for Adorable svg files.  So Fun! :) 

This cute little girl is from the Will U be my Valentine collection from Scrapping Bug Designs.  You can visit them HERE.  I must work on the eyes.  I would love to add  long wispy eyelashes, but that does not seem to be my talent at the moment, LOL!  I will keep practicing! :)  

I must admit I was very intimidated at the thought of going to a cutting system that operated without cartridges.  I was afraid I would get it only to find it frustrating, time consuming and hard to use.  I can now say...that's not the case at all.  There is a small bit of learning, but once you have the basics you will see it's not that difficult.  For this card I was able to load the mat ONE time and get all the cuts I needed to create it.  With the exception of the hearts on the ground that I decided to add as an afterthought.  A true time saver in the end.  

Monday, December 31, 2012

Paper Piecing Teddy - Valentine Layout

I am super excited to show you my latest layout.  You see...for months and months I've been ooohhhing and aaahhhing over all the ADORABLE paper piecing projects that are out there.  However, I only had the Cricut so I had no way to create them.  That is until my super thoughtful sweetie gave me a Silhouette Cameo for Christmas.  And oh my... it is AMAZING!  It has opened up a whole new world of paper crafting.  Here is my first paper piecing layout and boy am I hooked. :)
   This cute little teddy and rock girl out fit are created from svg files from Treasure Box Designs.  You can visit them HERE.  All other cuts are from the Silhouette online store.  They are very similar to images found on various Cricut cartridges.
I can't say enough about how much fun I had doing this cute little teddy paper piecing.  One of the things I am most impressed with is how the Silhouette cuts such small details.  See the skull on the teddy's outfit...those cross bones and teeth are very small and slender.  It cut them Beautifully.  It even cut them perfect on my cheap black cardstock and that is Amazing!

Now you are probably wondering if I will continue to post projects made on the Cricut?  All I can say is...when I received my Silhouette...I had my mind set that I would utilize it along with my Cricut.  I planned to use what cartridges I already owned, but would not purchase new cartridges.  However, I am finding that I love the ease of cutting from files on my computer vs hunting for the right cut on a cartridge.  It is much easier and more time effective than I thought it would be.  For now...I will keep my Cricut and see how much I use it.  If I find that it never gets used I will probably sell it.  The good news is...with the exception of paper piecings...you will be able to use your Cricut and cartridges to recreate most any project I do. :)

Monday, December 17, 2012

Sneak Peek...Clear Explosion Box...

Tutorial coming soon... Clear Explosion Box using Better Than Acrylic.  Of course it does not have to be an explosion box.  There are multiple ways to keep the sides from exploding.  I wonder if Washi tape would hold the four sides together???
There is no lid on the box in the picture, but I do have a lid for it.  For the picture I hot glued the corners together.  I kind of made a mess and got hot glue all over the BTA.  Along with all kinds of fuzzy bits of burlap.  In my tutorial I will include a few tips on keeping your BTA nice and clear and glue free. :)

I Love how the little tree with ribbon curls turned out.  Along with the pretty little gifts.  I will include all the details in the tutorial.  If you were giving this as a gift with a gift card you could adhere the burlap around the edges only to form a pocket to hold the gift card.  Then it would be a present under the tree. :) 

This would also be really cute with a fireplace and stockings.  Perhaps using a tea light as the fire and build the fireplace around it.  Wouldn't that make the perfect little holiday accent light?  I just might give it a try and see what I  can come up with.

FYI...the BTA did not split or crack when making the box.  It held up perfectly.  I think the trick is to fold by hand and not use a bone folder to make an extra tight crease.

I am going to put the ordering information for BTA in my sidebar shortly.  For now here are the details once again.

Better Than Acrylic - 12"x12" sheets

$2.45 per sheet with a 10 sheet minimum order

No handling fee's, but there is a $1.25 fee for the mailer that I had to purchase. 

I can ship USPS priority mail or Ups ground service.  I will be happy to quote both to get the best price possible.

If shipping USPS insurance is optional, but recommended.  It runs $1.85 for $50.00 worth of coverage and $2.35 for packages over $50.00.  I am not responsible for uninsured packages.

If you are interested email me at bugjunkie@live.com.  Let me know how many sheets you would like.  Be sure to include your zip code and I will get you a quote.  TFL!   

Sunday, December 9, 2012

Better Than Acrylic Video Tutorial - Cutting on Electronic Die Cutting Machine & Heat Embossing...

Another video...I didn't realize how much I missed doing them! :)  You can find information on ordering BTA HERE.


Watch video to find out how to make this cute little snowman.


Saturday, December 8, 2012

Better Than Acrylic - Video

Finally I have a video for you.  It's my first video in over two years so I'm a little rusty.  Just focus on the product. :)  

  This video gives you a better look at this Amazing product.  The next video I do will start my actual tutorial series using Better Than Acrylic.  You are going to Love this stuff!

Ordering information can be found HERE

Friday, December 7, 2012

Better Than Acrylic...In The House & Shipping

I'm so excited to let everyone know I will be shipping your orders out today.  I worked like Santa's little elf last night to get it all packaged and ready to ship today! :)

When you get your order...there are a couple things to know:

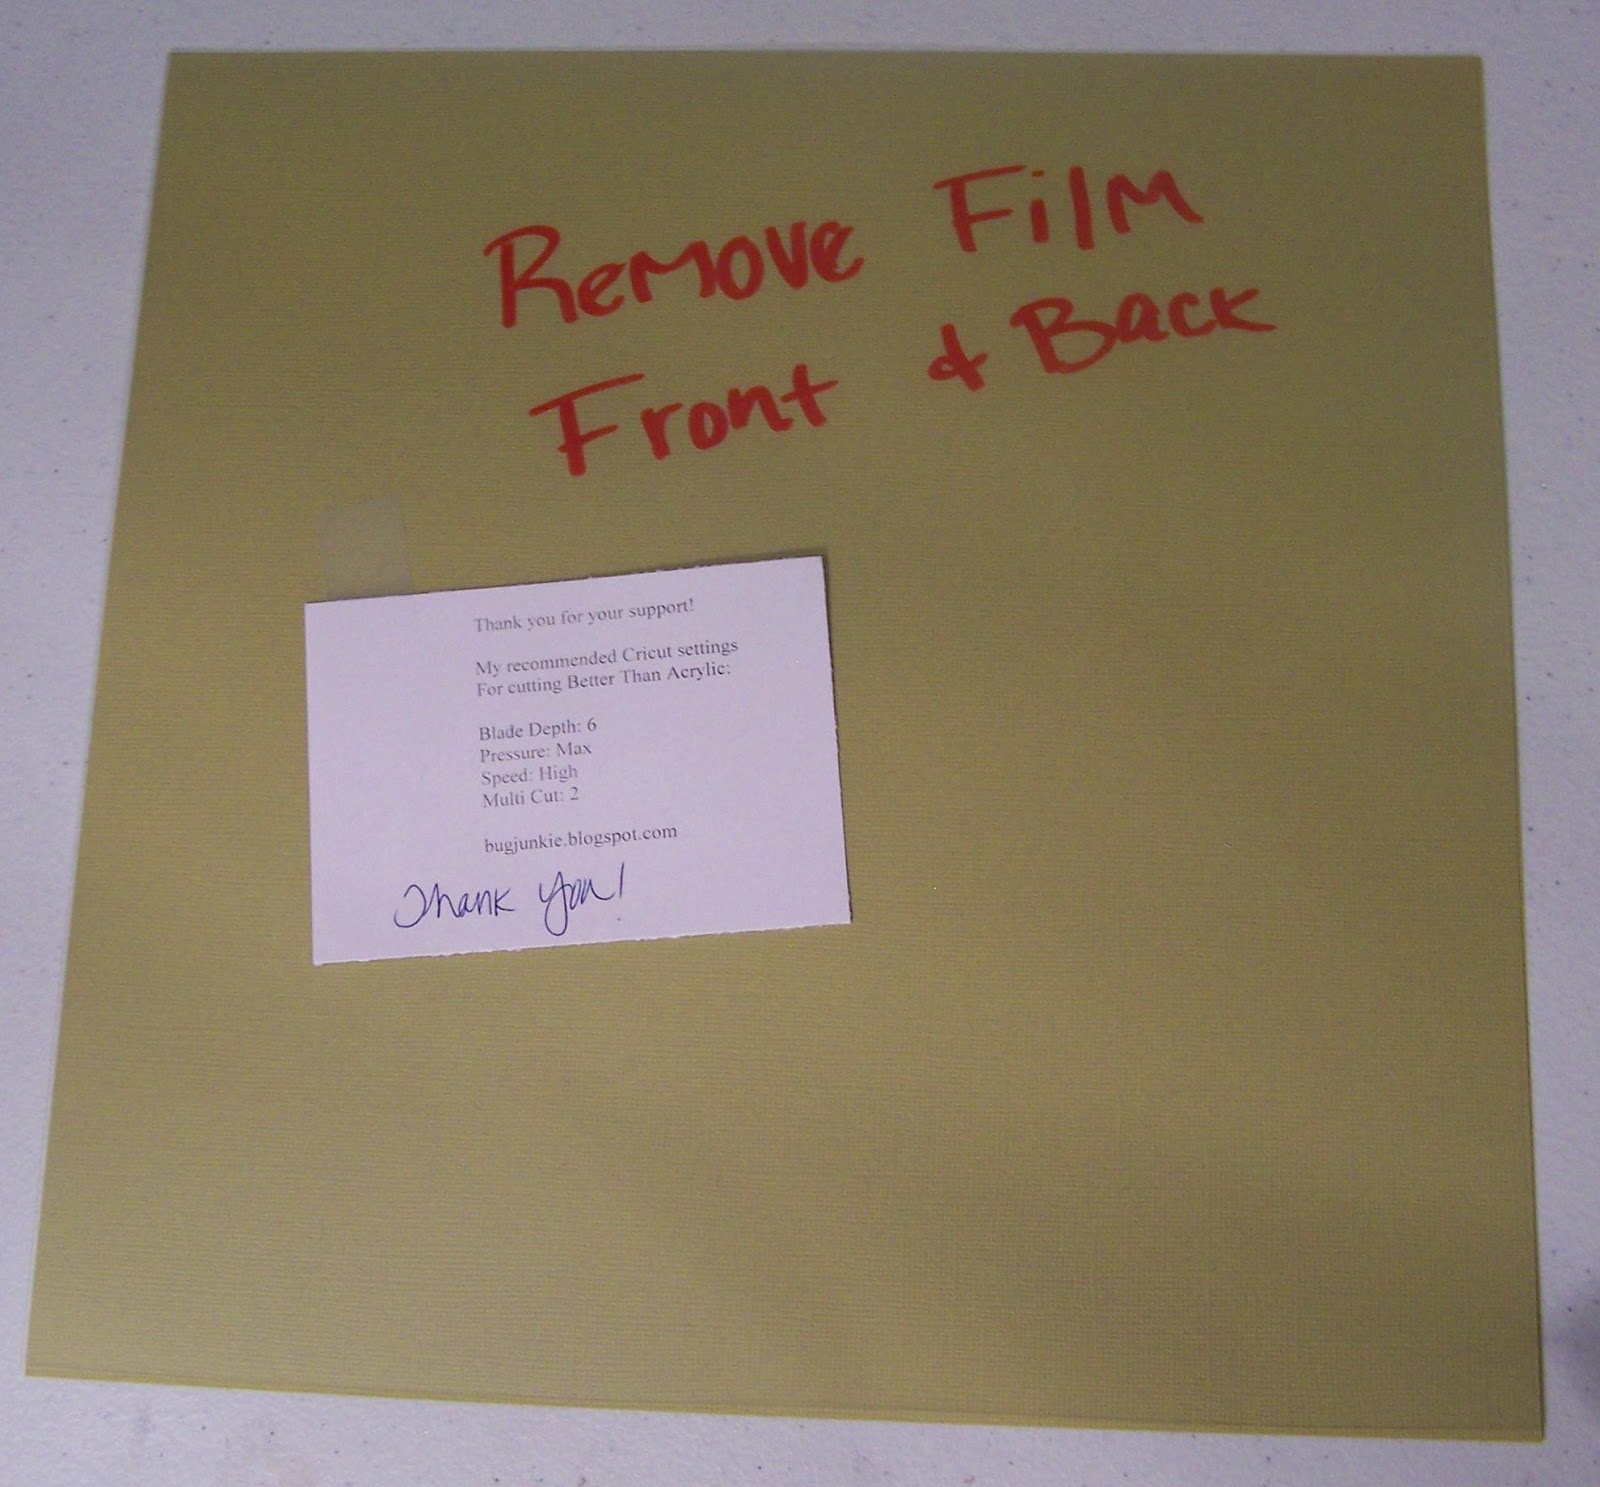
1.  There is a protective film on the front and back of each sheet.

2.  This film can be hard to detect.  It lays so nice and smooth that you wonder if they missed getting it on.  It is there.  Remember this material is... by my standard...crystal clear.  
To help you remember I have included a little note on the 1st sheet of every shipment.  As well as a cutting guide for your Cricut machine. 

3.  I want to do a video on heat embossing, but for now here a few tips to get you going:

A.  This material will melt if not heat embossed properly.  I recommend experimenting with a small scrap of BTA.

B.  You want to get the embossing powder and BTA warm, but not hot.  Do it for a few seconds then pull away.  Do a few more seconds and pull away.  Continue to do this until the desired result is acheived.  Do not get in a hurry to get it done and leave it too long at one time.

4.  My recommended Cricut settings for most cuts are:

Blade Depth: 6
Pressure:  Max
Speed:  High
Multi Cut:  2
If you are doing an intricate cut you might want to slow the speed down even more.

If your mat is very sticky and you don't want to chance getting adhesive on the BTA...try leaving the protective film on the side sticking to your mat... until after you've cut your image. I've only tried this on a very basic cut and it worked fine.

5.  Dry Embossing through a Cuttlebug or Sizzix machine...I've had very good results with this.  There are a couple things to keep in mind...

A.  If your sandwich is too tight it can cause the BTA to curl. 

B.  For most embossing folders the basic sandwich works great.  If you have a folder that seems to leave really deep impressions (I have one that I can think of) you might want to leave a plate out and add card stock shims in it's place.  That way you can make the sandwich a little thinner. 

Basic Sandwich Recipe:
Plate A
Plate B
Folder & Material (BTA)
Plate B

Hopefully this helps everyone get started using their BTA.  If you have any questions at all when you get your order please let me know.  

With work, family and getting ready for the holidays...I am Super Busy.  I have many more projects to do, but will have limited time until after Christmas.  I will try and get something posted this weekend if at all possible.

If anyone else wants to place an order for BTA send me an email bugjunkie@live.com.

Thank you all for your support!  I hope you enjoy  BTA as much as I have!  I welcome any and all feedback once you have a chance to try it out.