Thursday, July 30, 2009

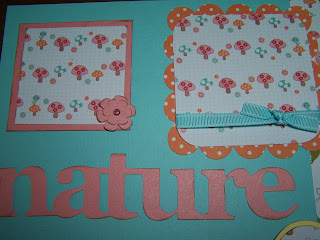
Enjoy Nature - imaginisce twitterpad collection

I just Love this paper line from imaginisce. It's
so Adorable!!! Used lots of extras to add pop and
bling.....pop dots, Kaiser pearls, Prima flowers, ribbon
from American Crafts and PTI, large brads are DCWV.
Cricut cartridges used....Graphically Speaking, Zooballoo,
Mini Monograms, A Childs Year, Storybook, Plantin SB,
George &Basic Shapes, Doodle Charms with DS to create
mushrooms....I think that's all of them. Click on pictures
to enlarge.


This photo mat is from ACY and I Love it. I think
it's my new favorite. I love the top and bottom edge.

Butterfly and enjoy are both from GS. I changed
the dot on the j to a flower.

Tree is from ZB. I Love how this turned out.
The primas give it just the right pop of color.


Little butterfly is from SB.


Nature if from GS.


This oval frame is from GBS. I used the center
point feature on the E to make sure I got the skunk,
butterfly and bee on this mat. Great feature that I need
to use more often.

The scallop frames are from Mini Monograms.

Wednesday, July 29, 2009

Circle of Friends - Thank You Lorrie, Sandi, Sandy, Jeannine


Now I'm starting to feel very spoiled...4 awards
in a row, WOW. You ladies are all Awesome! I
Love this award because in the blogging world it's
true, you have a circle of friends. I received this
award from:

Lorrie, http://scrappinstuff-lorrie.blogspot.com/
Lorrie has been such a help to me in the world of blogging.
Thank you for all you have done and for passing this
award on to me.

Sandi, http://softsideofsandi.blogspot.com/
Sandi is always so quick to leave good feedback on all
the projects I post on the MB. Things move so fast on
the board, but I know if she see's it she will always post.

Sandy, http://detailsbysandy.blogspot.com/
Sandy is one of the sweetest people I know. Although
I have never met her in person, she just comes across
as kind and caring and a very good person. She makes me smile.

Jeannine, http://jeannine-scrappnthehamptons.blogspot.com/
Although I've just recently got acquainted with Jeannine she has been
so faithful to check my blog and to post such great comments. She is
another great cyber friend and it means a lot.

I will pass it on today. Thank you all so much!
Passing on to:

http://fontjunkiesfilesandtrials.blogspot.com/

http://idratherbemakingcards.blogspot.com/

http://chirpingalong.blogspot.com/

http://kayminkreations.blogspot.com/

http://jackiespapercrafts.blogspot.com/


Here are the rules for this award: To pick up the Circle of Friends Blog Award cut and paste the award logo and use it on your own blog. Nominate 5 other bloggers you feel have become part of your circle of friends. Link to your nominees within your blog post. Include these instructions on how to pick up the award in your blog post. Link back to the person who gave you the award in your blog post, to show your appreciation. Comment on their blogs to let them know they've received the award.

Monday, July 27, 2009

Super Cute Mushroom Cards


We all know that mushrooms are very popular in the
paper crafting world right now. Although I'm sure there is
a mushroom somewhere on a Cricut cartridge, I could not
find one on any of mine. That's what I Love about the Cricut
Design Studio....a little patience and imagination and Wha La a mushroom!
The only Cricut cartridge used was Doodle Charms. I used the rabbit's
nose and the baby bottle...that's it! I welded them to make a card, but
plan to make more for my layout's. I did use MM for the scallop tag.


Saturday, July 25, 2009

A Childs Year Book

Although there are a couple of pages I really like,
I'm not sure I'm completely happy with this book.
I got a little messy with my ink in some places,
but figure ya gotta take the good with the bad. ;) I
think I am just a little off today.
Cricut cartridges used....A Childs Year and George
Basic Shapes. Misc Cuttlebug folders for embossing.
Primas, misc embellies, stickles and too much ink, LOL.


Here I am missing a close up of the little girl
holding the flower bouquet. Not sure what the
problem is, but couldn't get the picture to download.
The last two pages are probably my favorite.

Monday, July 20, 2009

Bread Dough Cherries

Just a simple card.....the scalloped sweet is from
A Childs Year Cricut cartridge. Background is embossed
with hearts on the Cuttlebug. Cherries are made with
bread and glue.

Sunday, July 19, 2009

Bread Dough Charms

This is the completed set of Spellbinders
Garden Delights charms made with bread
and glue. I lightly sanded the edges after
they dried and colored with Bic fine tip markers.
All the details posted below.

Friday, July 17, 2009

Making Charms and Embellishments with Bread Dough

Many of you probably remember the craft show Aleene's Creative Living
that was on tv about 15 years ago. They made flowers, especially
roses out of bread and glue. 1 slice white bread, crust removed to 1 Tbsp.
Aleene's Tacky Glue. Well I've revamped their recipe just a bit and add
aproximately 2 Tbsp tacky glue to one slice of bread. I have incorporated
the Cuttlebug and found a fun way to make charms and embellishments for your
cards and layouts. I know this would probably be better portrayed in a video,
but I'm not prepared to do that so I'm going to do the best I can with pictures.

Are you ready to go from this


To this?


This is an example of the roses they made on the show.
They too will work great on cards and layouts. Sorry I
forgot to add the little green leaves.
Pull up a chair and let's have some fun. To
begin remove and discard the crust from your bread.
Tear bread into pieces and place in a plastic cup or old
pan. Add tacky glue and stir with a craft stick or
your fingers.

Once you start mixing the dough it will begin to
take shape.
Once it starts holding together knead the dough
in your hands.
Continue kneading until it becomes smooth and
pliable. If you need to you can add a little more
glue.
Once you have accomplished this you will need to
decide how you want to color the dough. The original
recipe colors it with acrylic paint. Just make a well in
the dough and add paint. Knead the dough until the
paint is all mixed in. The roses above were colored
this way. I find this method a bit messy and prefer another
method that can be done after they are cut. You can also add
alcohol ink rather than paint, but the color will not be as intense.
Now the fun begins. Get your Cuttlebug and your favorite
Spellbinders or any other metal die. I am using the Garden Delights
Shapeabilites set.
Flatten the dough in the palm or your hand or you
can use something to roll it out. Just don't get it too
thin. Place your A plate on the Cuttlebug, then your B plate,
your die face up, the dough, and your 2nd B plate. When placing
the die and dough on the plate be sure to put it at the top of
the plate as the dough is going to move downward. Then run it through
the CB. If your dough is not flattened enough to fit in the CB just keep
flattening until your sandwich fits.
TIP: Make sure your CB plates are clean. Any fibers or bits of paper that
are on the plates will be impressed into your dough. Sometimes I run a bit of
dough through just to clean up the plates. The die does not have to be covered
in dough. Just place it at the top of the die and it will move down.
To get a better impression after I run it through the first time
I add a chipboard shim under the bottom B plate and run
it back through. Since it's already flat it will fit in the machine
much better this time. The key is not to get the cuts too thin or once
they dry they will break easily. You just have to find a happy medium.
This is what it will look like after a 2nd time
through the CB.
Then you just start pulling the dough away from
the cut or cuts.
This is what you should end up with. At this point
you can try and clean up the edges a bit. Once it's dry
you can knock off any dough that's sticking out and probably
could give the edges a very light sanding.
Now you need to let the dough get good and dry.
To start with you will want to lay something on top
of the dough....I use my B plate. This keeps the dough
from curling. Just leave it for several hours. Then you
can remove the plate and let it get some air. It's ok to turn
your cut over to dry the back too. If it starts to curl just put the plate
back on top for awhile. Once it's dry it will no longer try to curl.

Cuts drying under my B plate.


If you did not color your dough, you can now color your
image. For the watering can I used my Bic fine tip markers and
inked the edges with Cat Eye Chalk. Copic markers would probably
work great, but I don't have any yet. You can also use your ink to
color the image. The possibilites are endless and I'm sure you all will
come up with lots of methods to color them.
Another fun thing to do is the embossing folers. Below is an example of a
folder that looks like crocodile skin. I cut a croc out from the Animal Kingdom
cartridge and covered it with the dough. Actually this was just a scrap of dough
I had and did not quite have enough to cover the croc, but you get the idea.
Again, just be careful not to get the dough pressed out too thin or it will
crack and break once it's dry.
Hopefully this gets you started in the right direction to making
your own embellisments with bread and glue. I've not tried using
this method with any of the compounds you can purchase, but they
might work too. With all the folders and dies that are available
the possibilites truly are endless. Have Fun!

Saturday, July 11, 2009

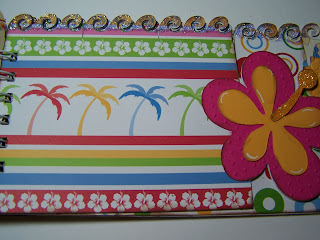
Life's A Beach Shape Book with Wave Border

Gotta love doing these books...they are so muchFun!!!
Designed in design studio using the following Cricut cartridges:

George and Basic Shapes
Cuttin Up
Life's A Beach

Patterned cardstock is last year's DCWV Summer Stack. Added stickles for bling. All
embossing done on the Cuttlebug. Click on the pictures if you want to see close ups.
I will post the cut.file on the Cricut design studio forum shortly. TFL!


Sunday, July 5, 2009

Summer Shape Book

I took the idea of a word book, but added shapes
rather than spelling out a word. This is my first
time to make a book and I think I'm addicted. :)
I created this book using the Cricut design studio
software along the the following cartridges......
George and Basic Shapes
Alphalicious
Life's A Beach
Doodle Charms


All embossing was done with the Cuttlebug.
I used the Bind It All to put the book together.