Wednesday, February 29, 2012

SWEET SHOPPE - Explosion Box with a Twist - LOTS of Pictures

 There's just something about cute little boxes that look like candy stores.  They are super fun to make and are oh so cute.  This box has a new little twist ... a cute little window.  I recycled the round plastic packaging that was covering my new powder compact.  It's the perfect size to create a window.  Because it has some depth to it ... it's kind of like a bay window. :)
I cut the box out by hand ... then cut the window opening on the Criuct and used my Gypsy to get it just right.
 Cupcake cardstock is from the DCWV Sweet Stack.  Plastic hearts hanging in the window are from my stash.
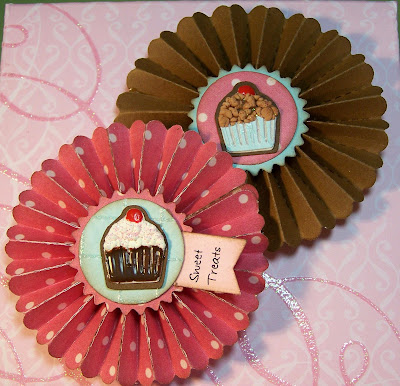
 Rosettes are made with the Tim Holtz Rosette die.  Cupcakes are cut from the Cricut Sweet Treats cartridge at 3/4".
 Fiskars border punch was used to create the scalloped awnings.

EKSuccess punch was used for the scalloped "window".

Swirly pink cardstock is also from the DCWV Sweet Stack.

 Now for the inside ...  I left a place to tuck a gift card beside the gumball machine, but did not make it to hold pictures.  Although that would be cute too.

Of course I had to include a cute little banner since they are all the rage at the moment.

  Every candy store needs a gumball machine and I found the perfect one on the Cricut Wrap it Up cartridge. Gumballs are tiny rain dots.  Glossy Accents is layered over the top of the rain dots to look like glass.


The candy counter with an old fashioned candy jar (cut from the gumball machine on the Wrap it Up cartridge).  Tiny candy pieces are from a punch I've had for years.  Ice cream sundae and cupcakes are from the Sweet Treats cartridge.  Liquid Applique and glitter are used to "frost" the cupcakes.
Inside view of the window.  I used hot glue to attach it, but think cool temp glue might preserve the plastic a little better.
Sentiment is computer generated.
Inside overview ... with the "flame" on the cake lit.  Flowers on the cake are from a MS punch.
Isn't it the sweetest little cake?!  This is the dainty little cake I had in mind when I was doing the Birthday Explosion box, but did not quite get it pulled off. ;)  Thanks to a wonderful idea by a very talented crafter I was able to get it right this time. :)  She uses a tea light as the base of the cake and the flame as the candle.  Now how clever is that?!  Click HERE to go to her tutorial over at SCS.
I decided I wanted a double layer cake, but I needed to be able to access the bottom of the tea light to turn it on.  To get the top layer to stay put, but keep it easy to remove ... I used thin magnets.  They work perfect to hold it in place.  The magnets I used are by Basic Grey and can be found at Joanns.com.
The flame on my candle is red ... why you ask?  Because they are Halloween tea lights, lol.  That's all I had and decided it would look just fine. :)
Whew ... that was a lot of pictures to upload, lol.  If you made it this far ... thanks for sticking with me.  I hope it inspires you to get creative and have some fun.

Thursday, February 23, 2012

Larger Sheets of Cardstock ...

Am I the only one that would love to get my hands on larger sheets of cardstock?  Maybe 15x15 or 16x16?  I know the 12x12 is perfect when you are using the Cricut and other die cutting machines.  But ... what about all those handmade boxes and bags we like to make?  The 12x24 sheets work good for certain things, but not when you want a larger square box.  I'm working on an explosion box and was just thinking it would be nice if it were a little bigger.  Well that's my two cents for today. :)  Explosion box with a new twist ... coming soon. 

Sunday, February 12, 2012

You've Got Mail - Altered Tea Box

Here is a fun little mailbox complete with letters.  Using the tea box shown below ... I popped it apart so it would lay flat and I traced it onto a piece of 12x12 cardstock.  The cardstock was a tad short to get all the flaps so I had to cut a couple with the scraps and glue to the main part of the box ... make sense? ;)  This was my first attempt and I kind of messed up the top flap so it's not as crisp as I would like.  Next time will be better. :)
Love my Chai Lattes!

I decided to get brave and try something ... I stamped the heart flowers on the side of the box ... over the top of the ribbon.  Not perfect, but I  decided it gives character to the mailbox.
It dispense's the little letters perfectly.
I made a variety of letters by decorating pieces of cardstock with cute embellishments and writing little messages on the back. 

Saturday, February 11, 2012

Picture Frame Message Board

Another Pinterest inspired project. :)
I found this glass picture frame at WM and liked the swirls on it.  Although any old picture frame will do.  If it's wood framed you can easily spray paint it to the color of choice.

  Insert decorative paper in place of a picture. I decided to do solid paper at the top and emboss with the Cuttlebug Love Language Hearts folder.  Then I created a pocket with the red heart paper.  The edge is punched with a MS Deep Edge Punch.

The little notes I put in the pocket were some I had left over from another project, but I decided they would work for now. :)  
 I found something I like better than Dry Erase Markers for writing my message ... Wet Erase Markers.  They dry almost instantly and are smudge proof.  To wipe off all you need is a damp napkin or cloth.  Wet Wipes work well too.  This makes it easy to change out your message as often as desired.  

Friday, February 10, 2012

Valentine Postage Stamp Card

Here is a card I made awhile ago and never posted.  The problem with that is remembering the details.  I think the postage stamp cut is on the Cricut Birthday Bash cartridge and is already a card using the card feature...I think.  I embellished with Bakers Twine and a charm, stamps and hearts.  The postage stamp heart is embellished with pink Liquid Pearls and pink flock.

Wednesday, February 8, 2012

Valentine Fortune Cookies

Here is a fun little Valentine project ... personalized fortune cookies.     On Pinterest there is a pin for free printables for your cookies and that's what inspired me to create my own.  Don't you all just love Pinterest?! :) 
To create them you will need 3" paper or light weight cardstock circles (if your cardstock is too heavy it's hard to get a nice fold).  You will also need  small strips of paper and multiple sentiment stamps.  Of course you can hand write or computer generate your sentiments if you prefer.
For an added touch you can trim the ends of your sentiment paper to have points like a banner rather than a straight edge.
Lay your sentiment in the center of your circle and fold as shown above.  Secure with adhesive.  I used my ATG and it worked great.
Then fold in half to complete your fortune cookie.  Once you are done folding you might have to plump out the ends of the cookie if they look too flat.  I had fun using different Valentine papers for this, but I like the realistic fortune cookie look too.  Some ink on the edges would give an even more realistic look.  You can also emboss your circles for another fun look.  Add to your favorite container ( I used a recycled candle jar) and decorated it with a tag and some ribbon.

Monday, February 6, 2012

Cupcake Party Invites

Aren't they so Cute! :)  I used the Cricut Sweet Treats cartridge and my Gypsy to create these cupcake invites.  Then a couple of my SIL's and I had fun decorating them.  
I love the dainty pink flowers mixed with the brown polka dots.  We ran the base of the card through the Cuttlebug using the Pajama Stripes embossing folder ... to make it look more like a cupcake wrapper.  The pink layer of frosting was embossed with the D'vine Swirls folder.
I
To top it off we stamped a 1" circle tag and attached it to a cute ribbon bow.

Friday, February 3, 2012

Birthday Bash Explosion Box

I made this explosion box for our daughter's birthday.  It was a last minute idea ... I started on it last night and we celebrated her birthday tonight.  So most of the box is pretty simple and without a lot of fluff. :)  Click on picture to enlarge.
However, I did take the time to make a cute little party banner.  I love how it turned out and especially how it hangs over the table.  To do this I punched a hole in two opposite corners of the box and set an eyelet for added strength.  Then I pulled the banner nice and tight and tied it through the eyelets.  Banner will fold right up inside the box when it is folded up.
The birthday cake did not turn out like I had envisioned, lol.  I wanted a cute dainty little cake, but ended up with a nice fluffy one... thanks to a good amount of Liquid Applique. :)  I added some quick little pockets to hold her birthday money.  All paper is from the DCWV Celebration Stack.  Birthday Bash is the only Cricut cartridge used.

Happy Birthday Kara!  We love you so very much!!!